How to Get a Perfect Rubber Flat Roof Installation
When it comes to rubber flat roof installation, there’s a lot more to it than simply rolling out a membrane. Over the years, I’ve worked on everything from residential patios to commercial warehouses, and the roofs that last decades share one thing in common: meticulous attention to detail.
I still recall a commercial project where the building manager wanted the installation rushed. They assumed a flat rubber roof was “simple.” By cutting corners, the original crew caused bubbling and seam failure. We had to redo the installation, reinforcing deck prep and seam alignment. That experience taught me that applying EPDM rubber roofing correctly is both an art and a science.
Why Choose a Rubber Flat Roof
Rubber flat roof installation is highly popular for flat and low-slope roofs due to its flexibility, waterproofing, and durability. EPDM rubber is particularly resilient against UV, ozone, and water penetration.
On multiple epdm rubber roofing installation projects, I’ve seen EPDM outperform modified bitumen and TPO systems, especially in climates with freeze-thaw cycles. Its ability to expand and contract without cracking is unmatched.
Preparation: The Key to a Successful Installation
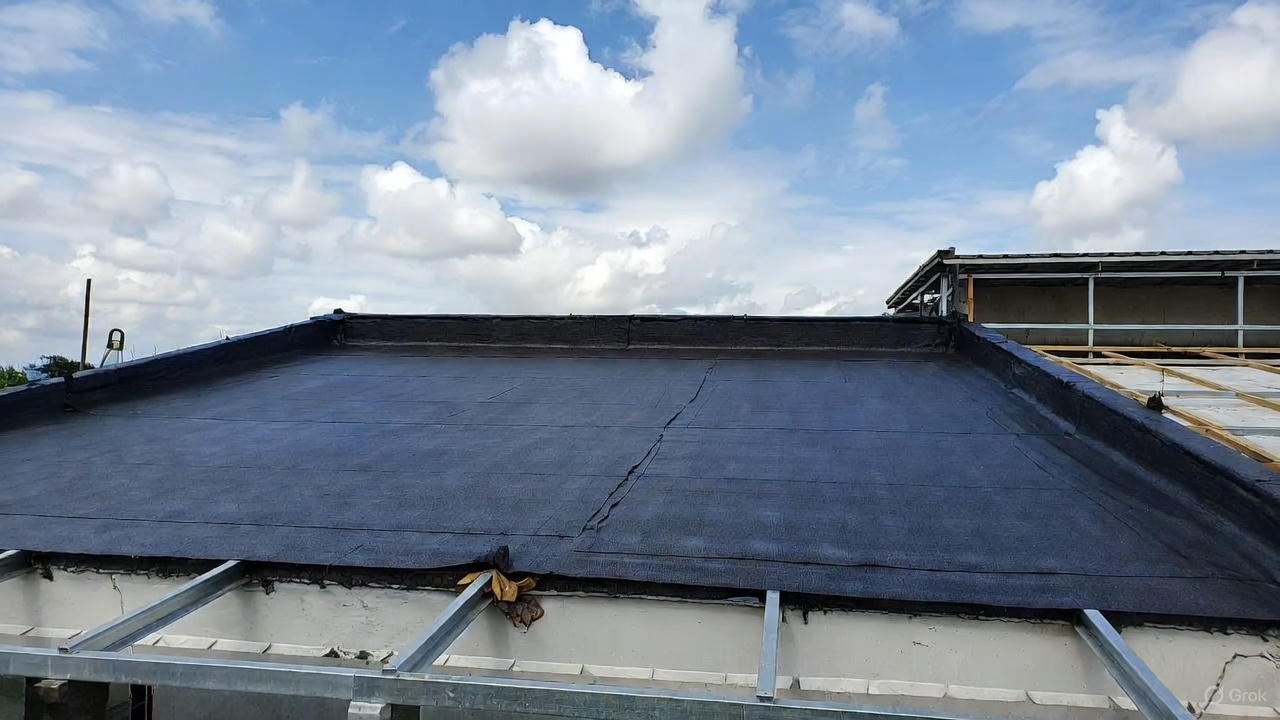
Before fitting EPDM roof, the deck must be clean, dry, and structurally sound. Even small debris or moisture can lead to wrinkles, bubbles, or adhesion failure.
On a recent warehouse project, we spent a full day leveling and cleaning the deck before rolling out the membrane. It seemed tedious, but that prep ensured the rubber flat roof installation went flawlessly. Proper preparation is the foundation of a long-lasting roof.
Step-by-Step Guide to Installing a Rubber Flat Roof
A proper installing EPDM rubber roofing job requires patience and precision. Here’s how I approach it:
-
Deck Inspection & Repair – Identify weak spots or rot and replace any compromised areas.
-
Membrane Placement – Roll out the EPDM and allow it to relax, preventing tension-induced wrinkles.
-
Adhesive Application – Apply adhesive evenly; consider temperature and humidity for proper curing.
-
Seams and Flashing – Carefully seal edges, corners, and penetrations. EPDM roofing installation details here are critical to prevent leaks.
-
Final Inspection – Walk the roof to ensure proper adhesion and smooth seams.
On a Firestone project using firestone epdm rubber roofing installation, we had multiple HVAC units. Careful measurement and alignment around penetrations prevented water pooling.
Common Mistakes to Avoid
-
Rushing Adhesive Application – Leads to weak bonds and bubbles.
-
Ignoring Corners and Penetrations – These are the most frequent leak points.
-
Skipping Deck Prep – An uneven or wet deck compromises the membrane.
Early in my career, I corrected a roof where the installer skipped primer and rushed seam adhesion. It took extra time but ultimately prevented long-term failure.
Tips for a Long-Lasting Rubber Roof
-
Use Quality Materials – Cheap membranes or adhesives fail quickly.
-
Work in Sections – Prevents shifting and ensures proper alignment.
-
Check Weather Conditions – Extreme heat or cold can affect adhesion.
-
Maintain the Roof – Annual inspections of seams, edges, and penetrations extend the roof’s life.
I’ve seen ten-year-old EPDM roofs still performing perfectly because these small steps were respected during installing rubber roof.
Professional Insights
-
Always follow manufacturer recommendations for adhesive and seam tape.
-
Use reinforced membranes for high-traffic areas.
-
Prioritize edge sealing and corners—they are the most critical areas.
-
Safety is paramount: harnesses, scaffolds, and protective gear are non-negotiable.
Experience is critical. I’ve corrected several roofs where homeowners attempted applying EPDM rubber roofing themselves. Each case required extensive rework to ensure durability and waterproofing.
Real-World Example
A mid-sized commercial building had a failing flat roof due to poorly aligned seams and inadequate adhesive. We removed the old membrane, prepped the deck, and reinstalled using careful how to fit EPDM roof techniques. Two years later, even after heavy storms, the roof remains leak-free.
This example shows that rubber flat roof installation is not just laying down a membrane—it’s a disciplined process requiring skill and patience.
Final Thoughts
Proper rubber flat roof installation ensures decades of protection for your building. Whether it’s installing EPDM rubber roofing, fitting EPDM roof, or applying EPDM rubber roofing around tricky penetrations, every step matters.
Experience, attention to detail, and adherence to professional standards guarantee a reliable, long-lasting roof. Don’t cut corners—invest in a proper installation and enjoy a leak-free roof for years to come.